
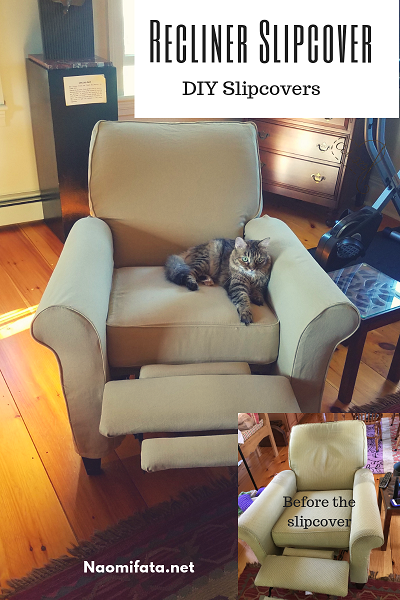
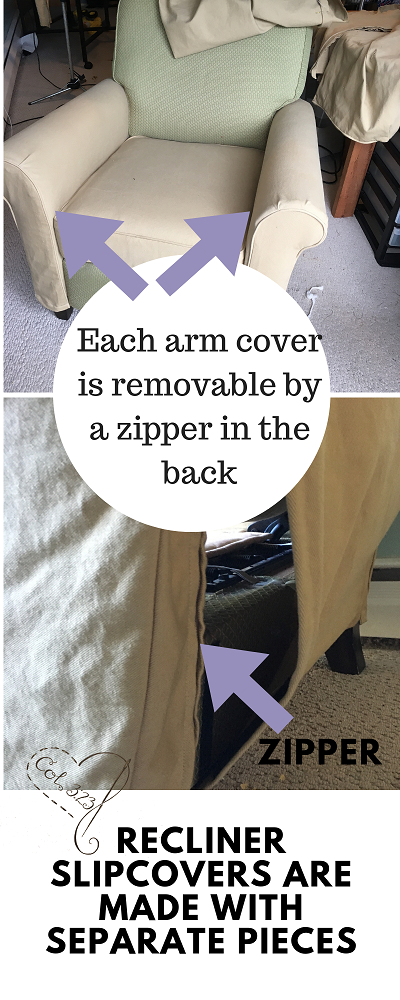
Recliner slipcovers may seem like a daunting task because of all the moving parts. It would be annoying to have to constantly retuck the fabric every time you move the chair into the recline position. This recliner has four main pieces. Two arms, the back, and the cushion.
The cushion you can easily construct similar to the bench cushion cover post that I shared last week. This cushion for the recliner does not need a new insert but just a new cushion cover.
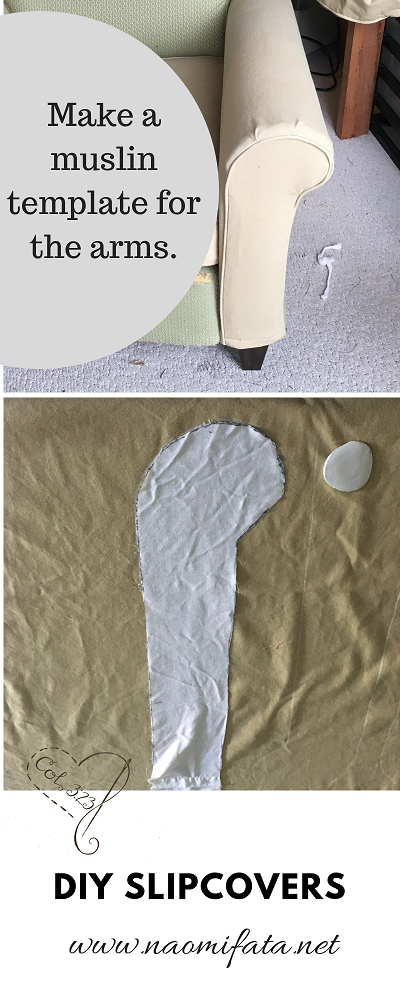
Then the arms can be made. First I start by making a muslin template.
One template will have to be made this way and then flip the muslin over and trace another one. This way you will have one for the right arm of the chair and one for the left.

After you cut the template it will need to have welting attached. You can make your own welting by sewing bias strips together and filling it will this cotton cord. You will also need to make a muslin template for the rest of the arm. There are several darts in the back because of the curvature of the arm. Then the arm will close in the back with a zipper.

Slipcovers can be a beautiful way to enhance your home. Check out some of my projects for your own slipcover inspiration.
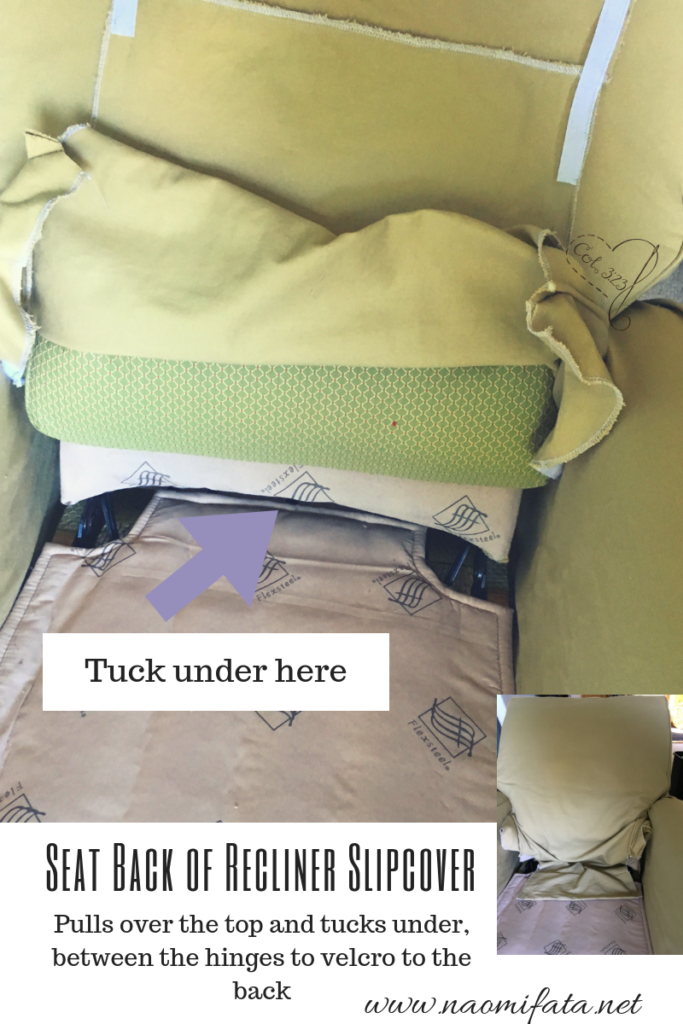
The back is a bit tricky as you can see in the pictures below .
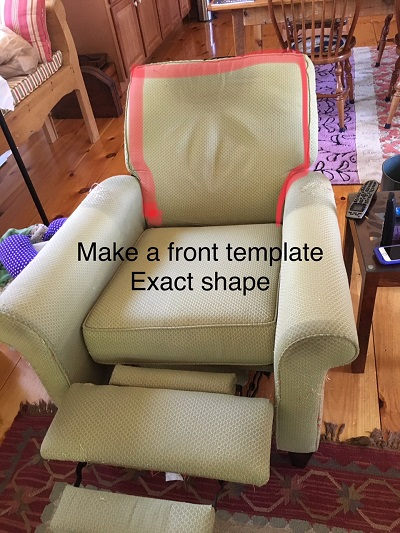
First make a template the shape of the front, you will be tracing the exact shape onto your fabric but then will need to leave a bit of extra fabric on the bottom to go between the hinges and velcro up the back. For this on I left about 18″ to tuck.
The image below shows how to tuck the fabric through the hinges. It will then velcro to another piece of the slipcover to hold it tight. Sew on velcro can be found on amazon.
If you look at an upholstered recliner you will see that the back usually velcros at the bottom and then velcros underneath. The slipcover is going to use the same pieces of velcor already on the chair. I did have to cut off the orignal back panel (the old fabric) so that it wouldn’t get in the way of the new fabric.

I have several IGTV videos while I was making this chair which you can find if they might be helpful.
There are a few tools that I use for all my slipcovers, those can be found in my post on tools for DIY slipcovers.
To learn more about the art of slipcovers you can download my 16 page ebook on slipcovers.
Virtual Sewing Classes


PDF TUTORIALS
-
 Beginner Mending and Alterations for the Home$20.00
 -
3 Textiles Lessons Your Kids will love for your homeschool$12.00
-
Create a Boxed Pillow with this Step-by-Step Tutorial$8.00
-
Master the Basics of Your Sewing Machine – Tips for Beginners$5.00
-
How to Repair Elastic Waist – Easy Steps!$8.00
-
How to make the waist of jeans smaller with darts$4.00
-
How to Replace a Jacket Zipper PDF Tutorial$6.00
-
How to Shorten Jacket Sleeves Tutorial$4.00
-
How to Alter a Coat Tutorial$6.00


