
This post may contain affiliate links so I earn a commission. Please read my disclosure for more info.
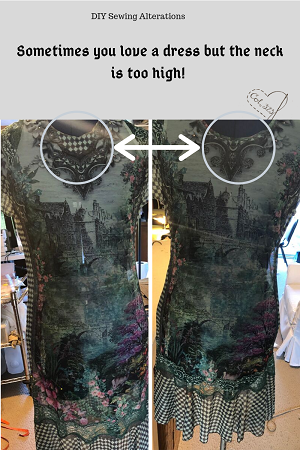
Sometimes dresses come with high necklines. Maybe you want to wear a special necklace or you just prefer to have the neckline lower for comfort. This can be tricky but not impossible and with some ingenuity you can have amazing outcomes!
I have a client who love the Michal Negrin designer dresses. She brought me two very similar dresses that had a high neckline. One I altered using flexi-lace hem facing , and the other dress I had to shorten so I used left over fabric from the bottom of the dress.
First I mark the center of my desired neckline with a dressmaker pin or safety pin. Then use tear away interfacing or a scrap piece of muslin to shape the desired neckline. The tear away interfacing is ideal because if you do happen to stitch some of it in the seam it is easy to tear out (hence the name tear away).
Do you love to thrift?
Did you know that thrifting opens up a whole new world of possibilities when you consider you thrifted options with sewing in mind? This download is filled will ideas about what to look for with some sewing in mind.

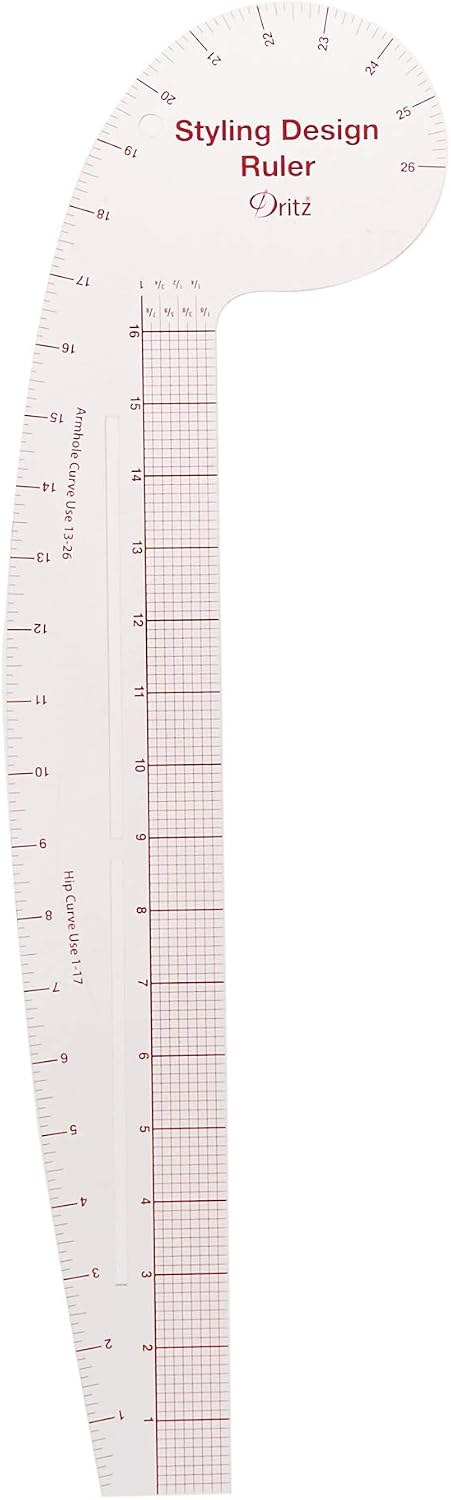
I like to use a french curve when I am shaping the neckline. It makes having the right shape scoop neck much easier than trying to do it by hand.
To make the neckline symetrical I fold the interfacing or muslin in half as shown in step 2 of the picture above and then trace my shape with the french curve, cutting on the traced line as shown in step 3 above. Then lay it on the dress and pin down gently.
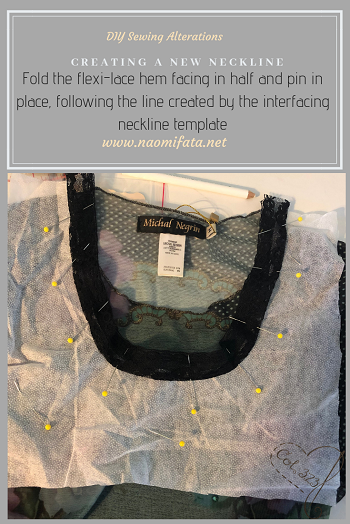
Buy flexi-lace hem facing that is 1 3/4 inches wide so that it can be folded (and ironed) in half. (If you are looking for an iron – check out my favorite one on amazon)


After machine stitching the flexi-lace down, tear away the interfacing (which was your guide for the neck curve). Refer to #1 of the image above.

Then trim away the old neckline and some of the flexi-lace facing. Leave about 3/8″ of the flexi-lace facing on the seam allowance. (#2)
Then you will turn under and top stitch. Note that this particular fabric is stretch and will need a stretch seam for the top stitching. (#3)
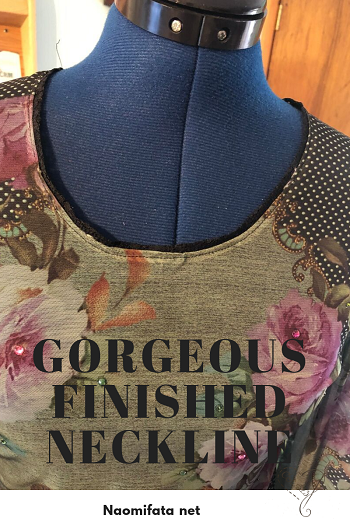
Below is your finished result which is simply beautiful!
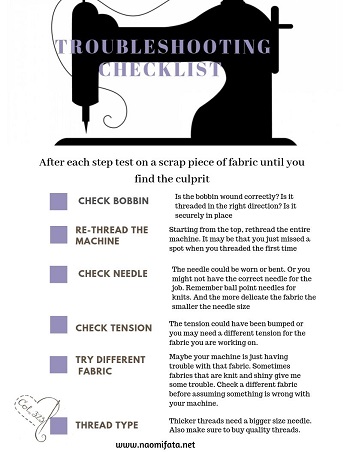
Before you go, if you ever have trouble with your sewing machine stitches not working be sure to check out my trouble shooting post and grab your free troubleshooting checklist.
For a similar post on how to alter the neckline check out this post on altering the neckline of a knit shirt.
Virtual Sewing Classes


PDF TUTORIALS
-
 Beginner Mending and Alterations for the Home$20.00
 -
3 Textiles Lessons Your Kids will love for your homeschool$12.00
-
Create a Boxed Pillow with this Step-by-Step Tutorial$8.00
-
Master the Basics of Your Sewing Machine – Tips for Beginners$5.00
-
How to Repair Elastic Waist – Easy Steps!$8.00
-
How to make the waist of jeans smaller with darts$4.00
-
How to Replace a Jacket Zipper PDF Tutorial$6.00
-
How to Shorten Jacket Sleeves Tutorial$4.00
-
How to Alter a Coat Tutorial$6.00


