
This post may contain affiliate links so I earn a commission. Please read my disclosure for more info.
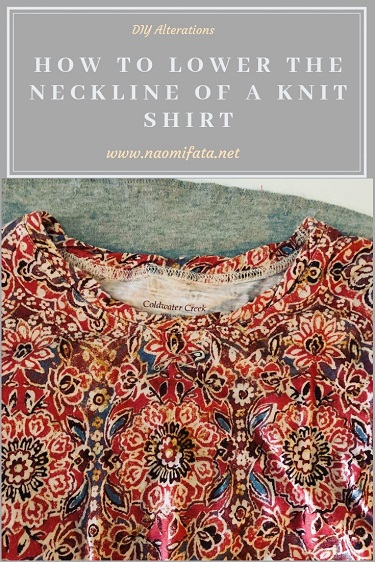
Have you ever bought a shirt and found that the neck is just a little too high for your comfort? Maybe the shirt is too close to your collar bone or gets in the way of your favorite necklace.
Learn how to lower the neckline
When you basic sewing skills you can alter the neckline to your liking. A client brought me this Coldwater Creek shirt, complaining that the neck was too high for her.
First I had my client try the shirt on and point to exactly where she wanted to lower the neckline to. I use a safety pin for this, partly because a regular straight pin will easily come out when the shirt is taken off. The safety pin should be centered on the neckline and measures the lowest point of the new neckline.

Remember the safety pin is marking the spot for the finished alteration, not the cut line to remove excess fabric.
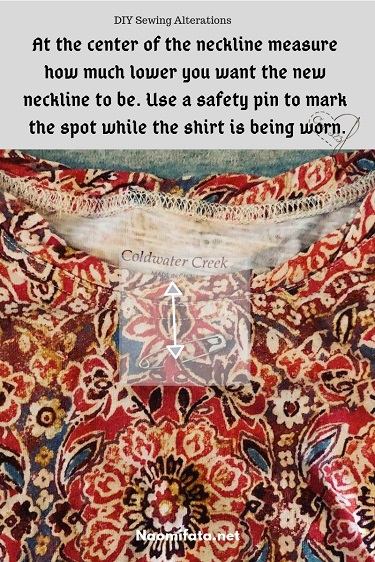
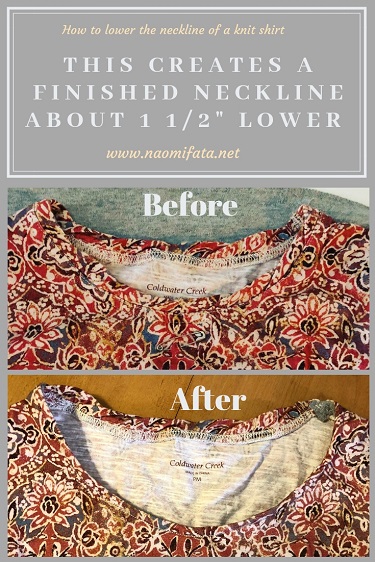
For this shirt I lowered the neckline approximately 1 1/2″.
There are several ways to proceed with the alteration.


I chose to use a facing, also out of knit material.
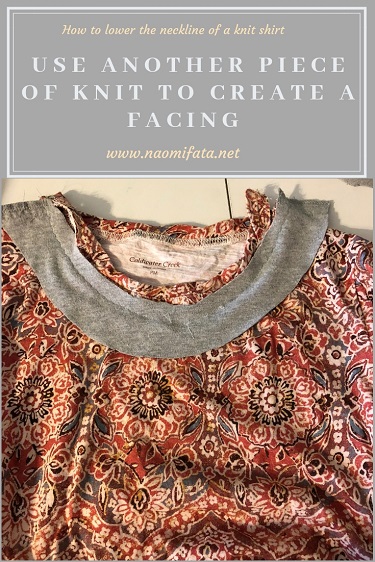
The image above shows the facing sewn on. For this project I wanted the shoulders to be the same width so the new neck needed to gently curve down from the orginal shoulder. A great tool to help mark the curve on the fabric is a french curve ruler.
Do you love to thrift?
Did you know that thrifting opens up a whole new world of possibilities when you consider you thrifted options with sewing in mind? This download is filled will ideas about what to look for with some sewing in mind.
The facing also needs to be sewn on using a stretch stitch or else the stitches will break during use.
After the facing is attached trim away some of the excess.
Then fold the facing under, making sure to roll it under far enough so that it isn’t seen from the outside.
Next top stitch about a half an inch from the edge of the new neckline. This will give the new neckline a finished look and no one will know the difference.
In the picture below you can compare the before and after image of the shirt.
If you struggle with understanding knits check out the article on Threads Magazine.
For other sewing alterations
If you are looking to earn money with your sewing skills check out my free download for alteration prices and the work order form I use to keep track of my projects.

Virtual Sewing Classes


PDF TUTORIALS
-
 Beginner Mending and Alterations for the Home$20.00
 -
3 Textiles Lessons Your Kids will love for your homeschool$12.00
-
Create a Boxed Pillow with this Step-by-Step Tutorial$8.00
-
Master the Basics of Your Sewing Machine – Tips for Beginners$5.00
-
How to Repair Elastic Waist – Easy Steps!$8.00
-
How to make the waist of jeans smaller with darts$4.00
-
How to Replace a Jacket Zipper PDF Tutorial$6.00
-
How to Shorten Jacket Sleeves Tutorial$4.00
-
How to Alter a Coat Tutorial$6.00


